
In this article, I’ll show you how to set up a NoSQL cloud database using MongoDB Atlas.
The MongoDB Atlas free tiers provide developers a turnkey solution to prototype and test applications using MongoDB as the backend database. Database as a service (DBaaS) aims to eliminate the tedious configuration process of a database while providing a scalable, highly available, and high-performance database.
Let’s take a look.
(This article is part of our MongoDB Guide. Use the right-hand menu to navigate.)
What is MongoDB Atlas?
MongoDB Atlas is a cloud-based NoSQL database service developed by MongoDB Inc. It was developed to offer a flexible, scalable, and on-demand platform to eliminate the need for costly infrastructure, configurations, and maintenance.
MongoDB Atlas provides all the features of MongoDB—without the need to worry about database administration tasks such as:
- Infrastructure provisioning
- Database configurations
- Patches
- Scaling
- Backups
Features of MongoDB Atlas
Key features of Atlas include:
- Cloud provider agnostic. MongoDB Atlas is a cloud provider agnostic service that allows users to run the database service on a cloud provider of their choice, including, of course, AWS, Azure, and GCP.
- Up-to-date features. MongoDB Atlas provides support to the two latest versions of MongoDB service with automatic patching and one-click upgrades.
- Scalability & high availability. Atlas can scale out and scale up to meet the database’s needs effortlessly while having a minimum of three data nodes per replica set deployed across availability zones, providing continuous database functionality.
- High performance. The MongoDB WiredTiger storage engine, along with compression and fine-grained concurrency control, gives the required performance for any database need.
Additionally, Atlas provides monitoring and alerts, strong security, workload isolation, and disaster recovery functions.
Setting up MongoDB Atlas
MongoDB Atlas provides a free tier that can be used for learning and prototyping databases. This free tier is called M0 Sandbox, and it is limited to 512MB of storage, shared vCPU, and RAM with 100 maximum connections on a single M0 cluster.
The MongoDB Atlas paid services are billed hourly based on your usage.
This section will guide you step-by-step guide through creating a MongoDB database cluster on Atlas using the free tier account.
Creating a MongoDB Atlas account
First, we need to create an account in MongoDB Atlas. There are two methods to create an account:
- You can use your pre-existing Google account to log in to the service.
- You can use your email to create a new account by providing an email address, name, password, and company name.
Review and accept the Terms of Service and Privacy Policy before clicking Sign Up. In this tutorial, we will use an email to create a MongoDB Atlas account.
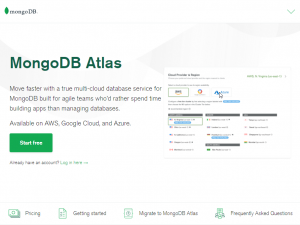
MongoDB Atlas website
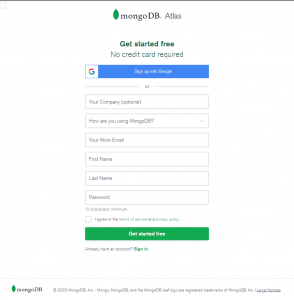
MongoDB Atlas registration page
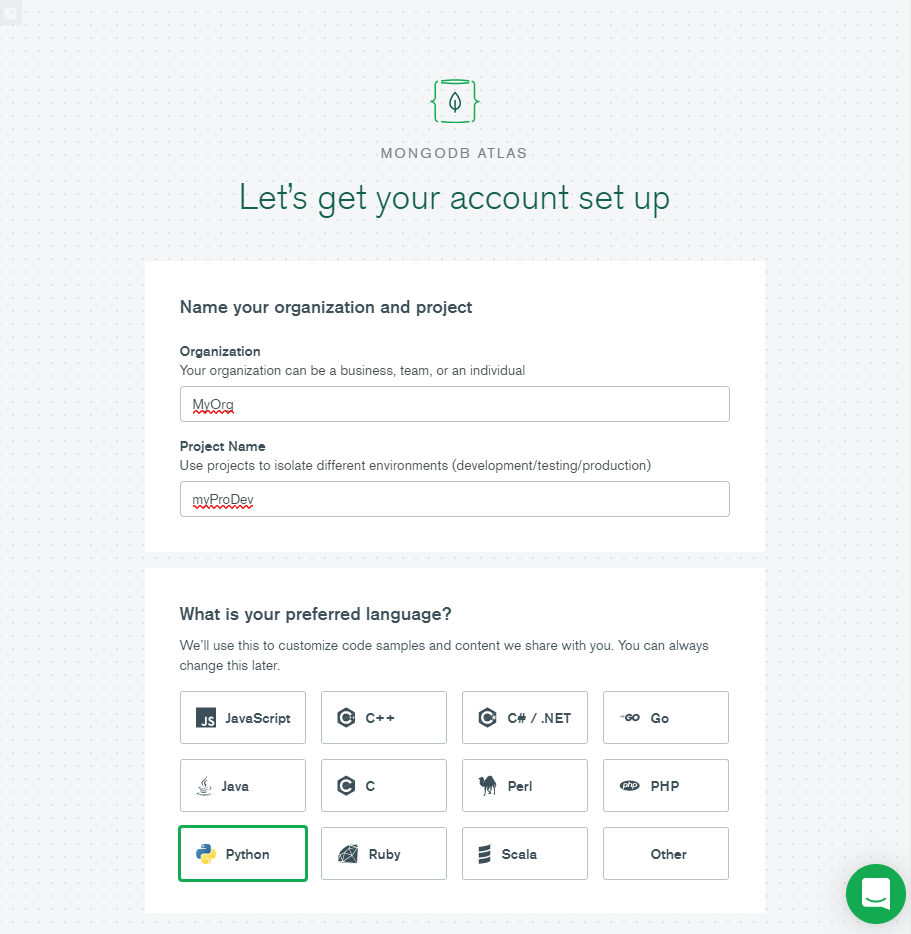
Configuring your Atlas account
After creating the account, enter the organization name, project name, and select your preferred language. For this tutorial, we will select Python.
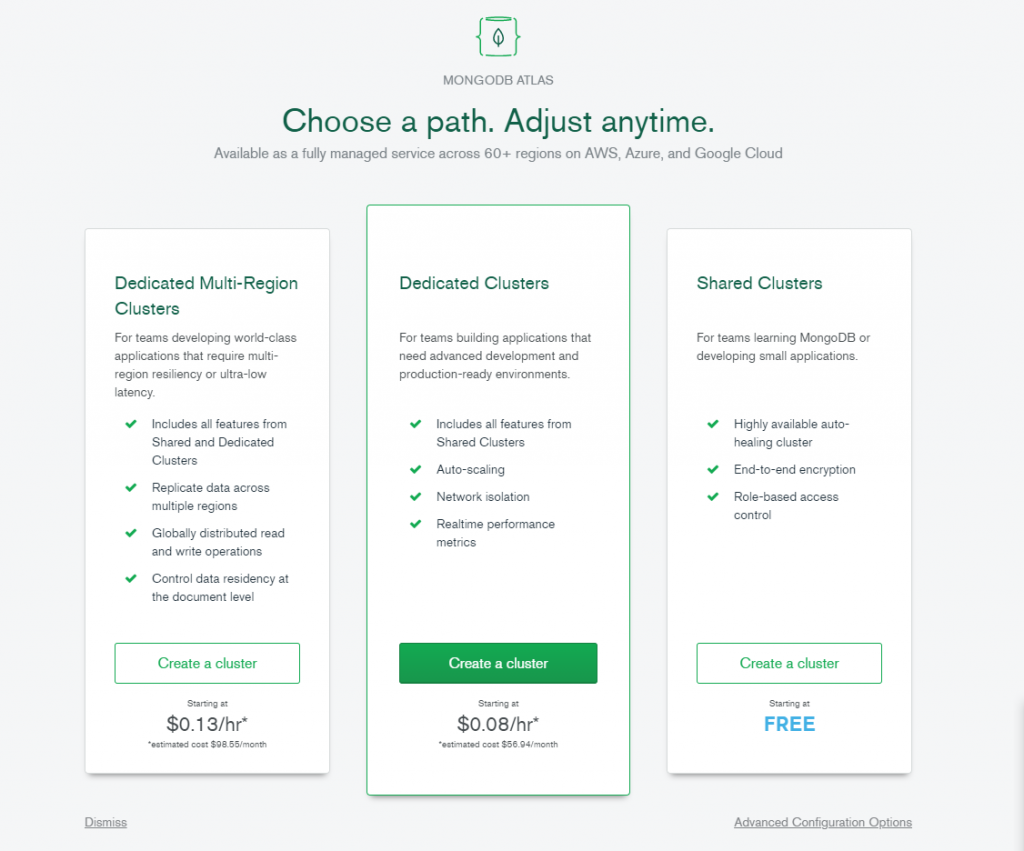
Select cluster type
We will select the Shared Clusters option because we are creating a free tier cluster.
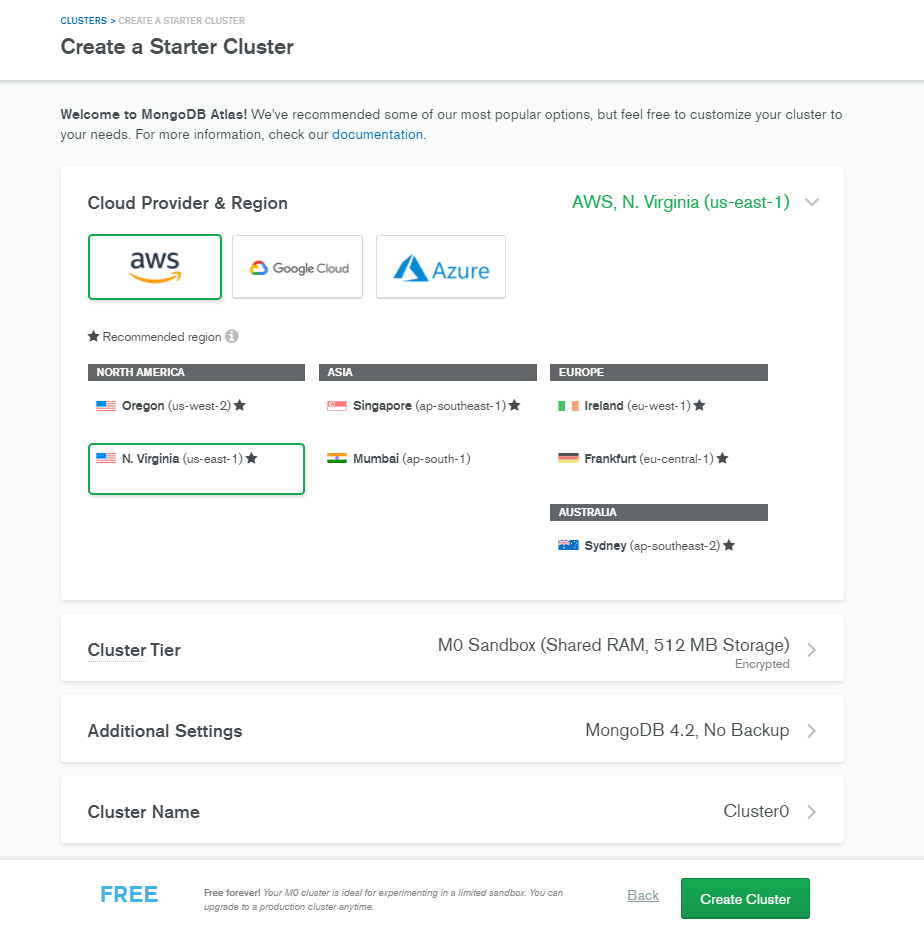
Create a starter cluster
After going through the above steps, you’ll be presented with the Create a Starter Cluster page. Here, you’ll select:
- Cloud provider
- Region
- Cluster tier
- MongoDB settings, like version and backup frequency
You can improve the connection latency between the application and the database by selecting a region closest to the location where your application is deployed. We will select AWS as our cloud provider and the N. Virginia (us-east-1) as the location.
Importantly, there is no option to create backups in the free tier. Finally, we name the cluster and click on Create Cluster to deploy the cluster.
Creating a starter cluster
Admin interface
It will take a couple of minutes after clicking on the Create a Cluster button to create a MongoDB with all the options specified. Then we will be redirected to the MongoDB Atlas Admin interface. We have named the cluster as MainDBCluster.
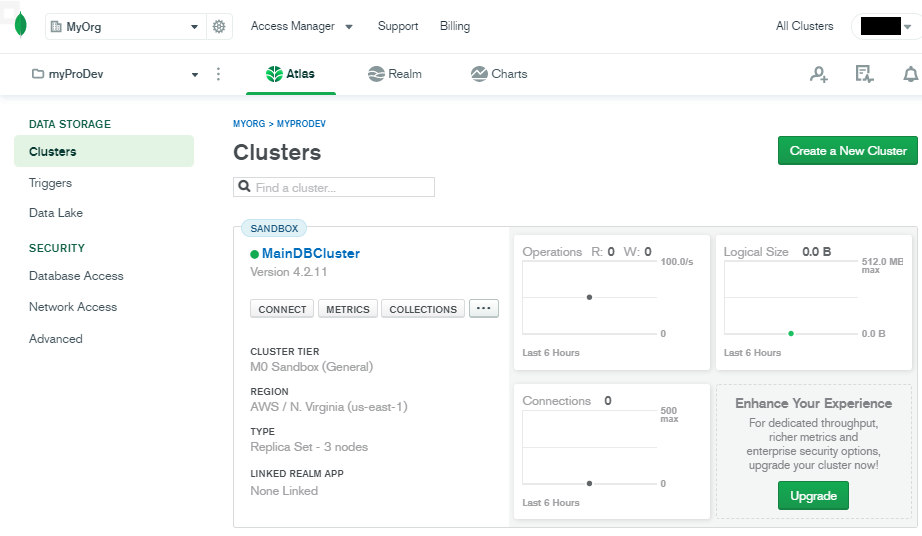
Admin Interface
Configuring your Atlas cluster
We have now successfully created a MongoDB cluster within MongoDB Atlas. Now, we must configure the access and security to the database before we can use the database. This section will cover the basic configurations of the cluster.
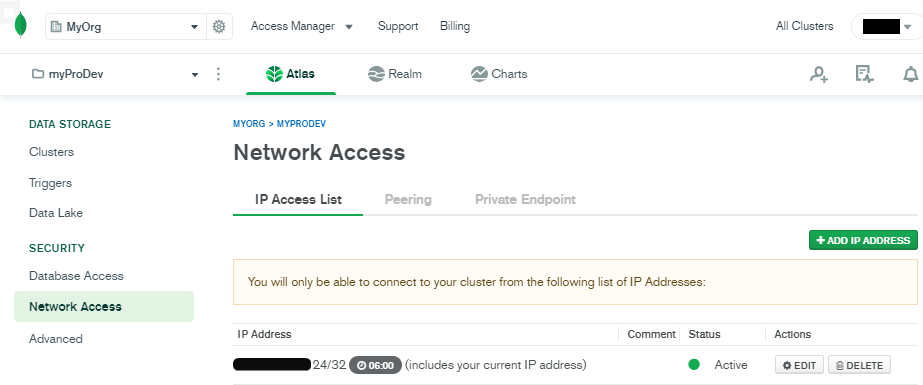
Whitelist IP address
The first thing to do is to whitelist the IP address that can be used to access the database. By limiting the database access to specific IP addresses, we can limit the security risk of unwanted connection attempts to the database.
To whitelist an IP address, go to the Network Access section. Then click Add IP Address and enter the details. We have the option to add the current IP address and configure an expiry time.
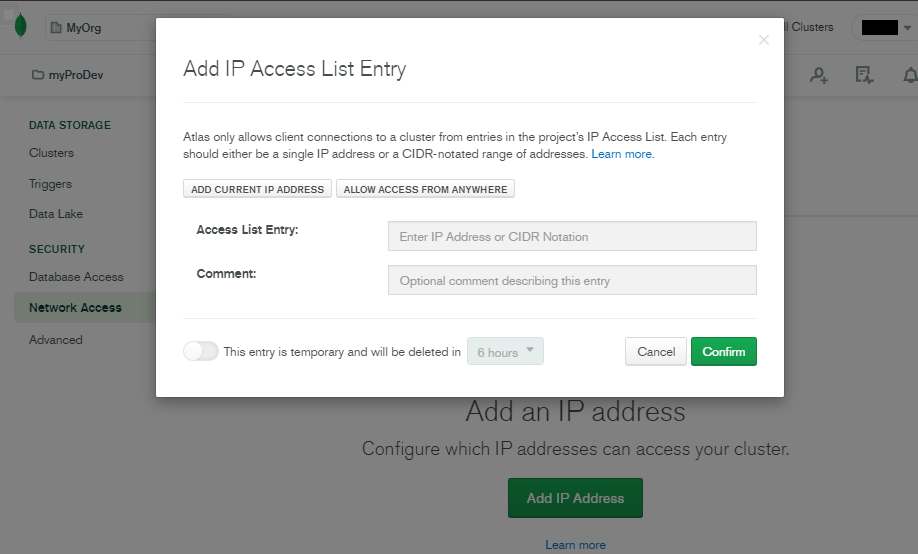
IP Whitelist page
We have selected a single IP with an expiry of six hours.
Create users
We can create users using the Database Access section in the MongoDB Atlas admin interface.
To add a user, click Add New Database User in Database Access, and enter the details of the user. Let’s create a simple user account with the Password Authentication method and give him Read and Write access to any database within the cluster.
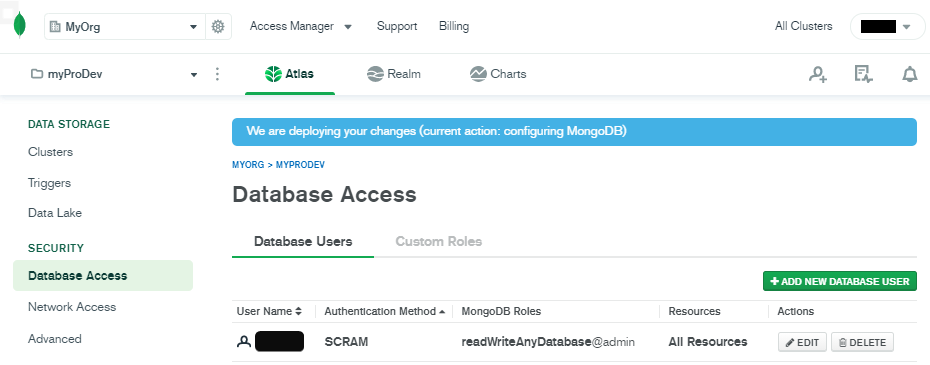
Database access page
Connect to the cluster
Within the Clusters section, click the Connect button in the MainDBCluster to connect to the database. MongoDB Atlas provides three methods to connect to the cluster:
- Connect with the Mongo shell
- Connect your application
- Connect using MongoDB Compass
We will select the MongoDB Compass as the connection method as it would provide us a graphical user interface (GUI) to interact with the database. After selecting the MongoDB Compass option, we have the option to either:
- Download the MongoDB Compass client
- Use an existing MongoDB Compass installation
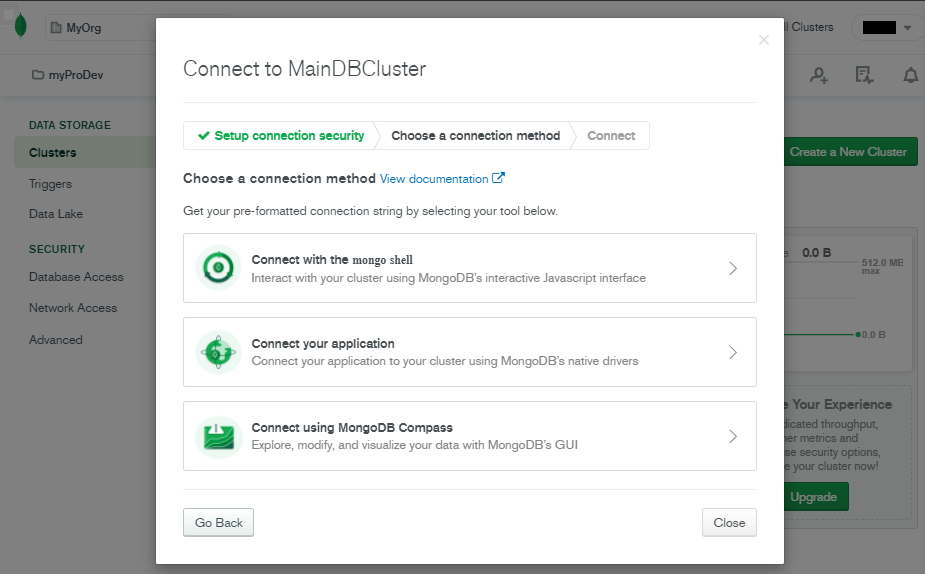
Connection methods
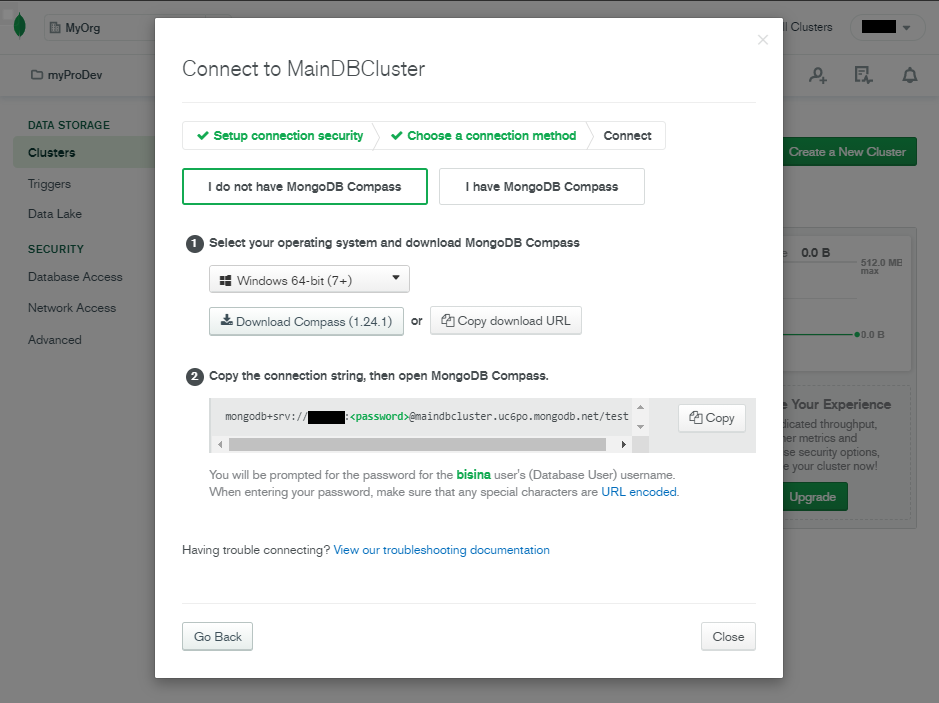
MongoDB Compass connection method
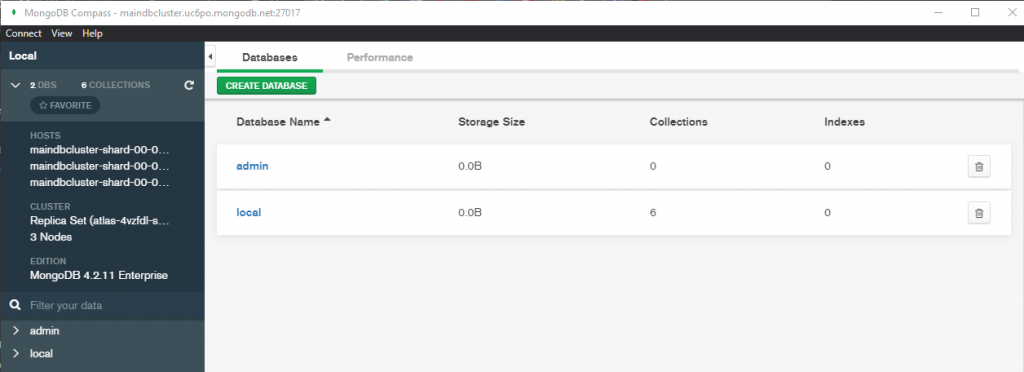
Access the database
Using MongoDB Compass, we will connect to the MongoDB Atlas cluster to access the database. We will start the MongoDB Compass application and enter the connection string and click on Connect.
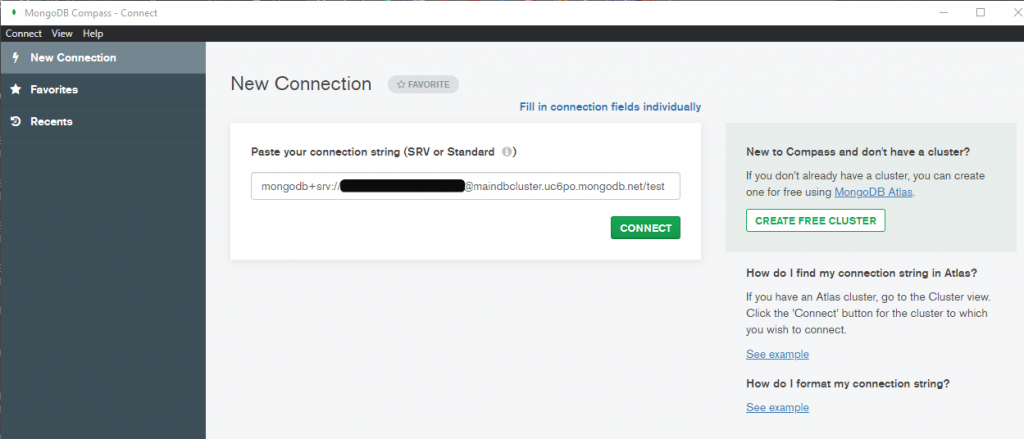
MongoDB Compass Connection Interface
After a successful connection, you’ll be presented with the MongoDB Atlas cluster (MainDBCluster).
Interacting with the database
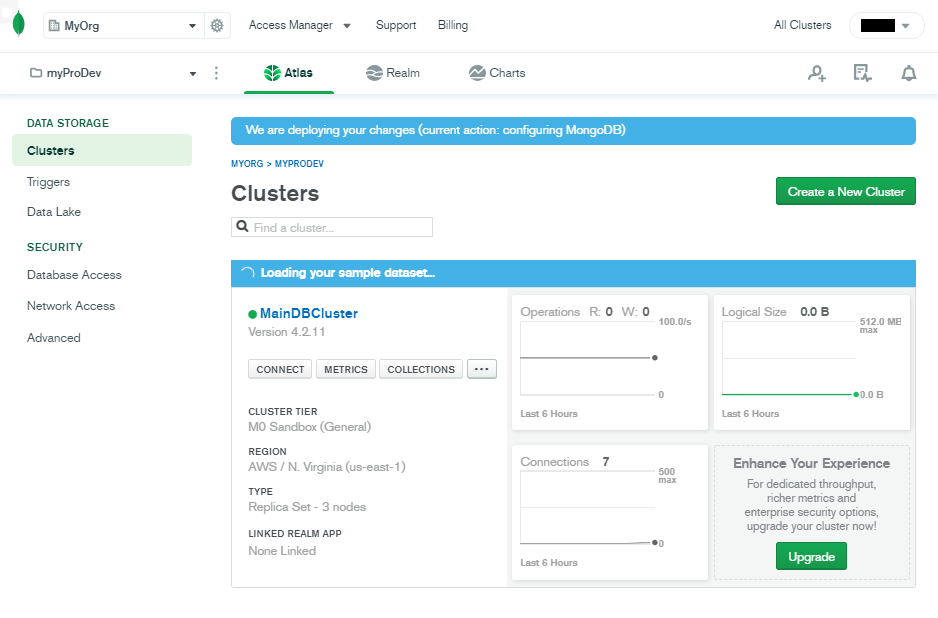
Let’s see how we can interact with the database using the MongoDB Atlas admin interface. MongoDB Atlas provides a sample dataset that can be added to a cluster for testing purposes. To load the sample dataset, select Load Sample Dataset in the Clusters section in the admin interface.
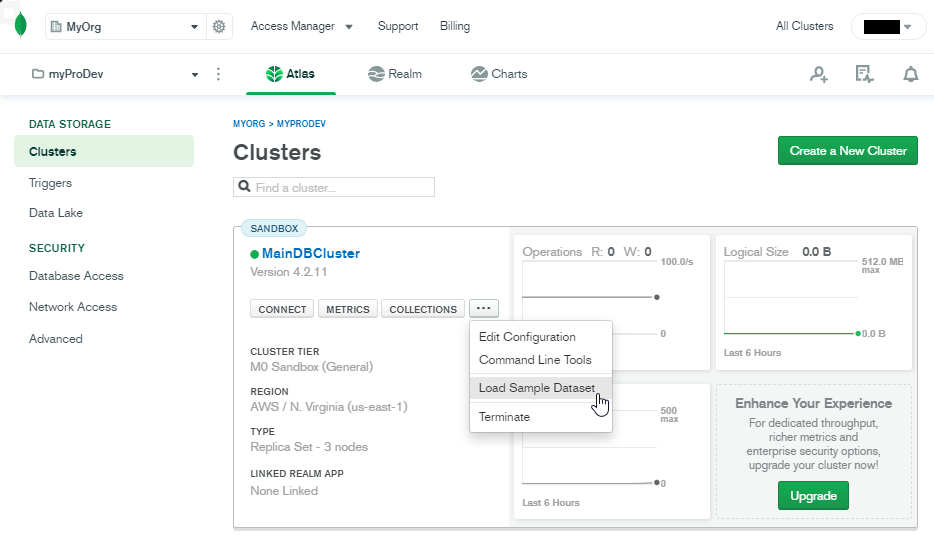
MongoDB Atlas admin interface
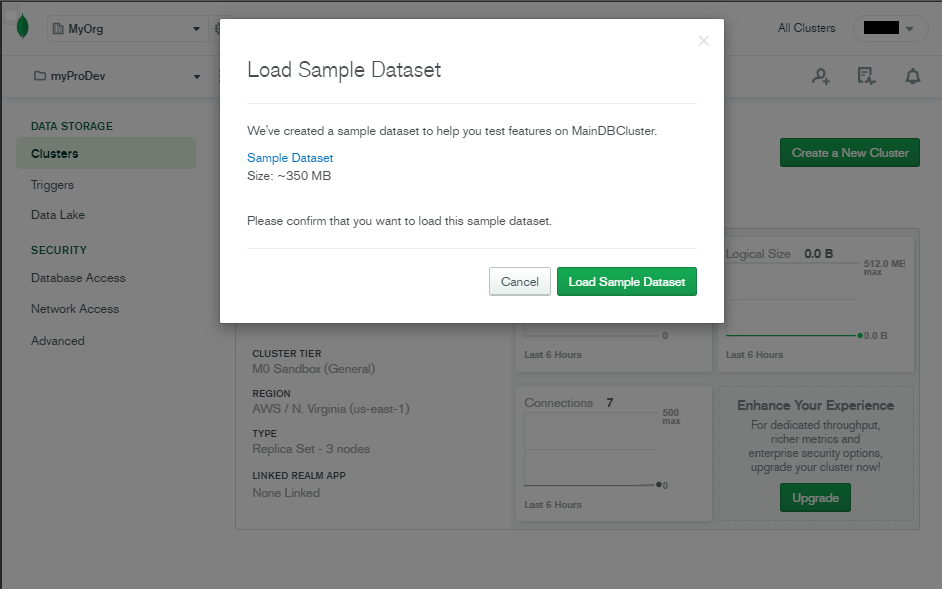
Load sample dataset
After successfully loading the sample dataset, we can interact with the data using either:
- The MongoDB Atlas admin interface
- MongoDB Compass
Using admin interface
Within the admin interface, we can click the Collections button in the MainDBCluster. Then you’ll be redirected to the Collections section.
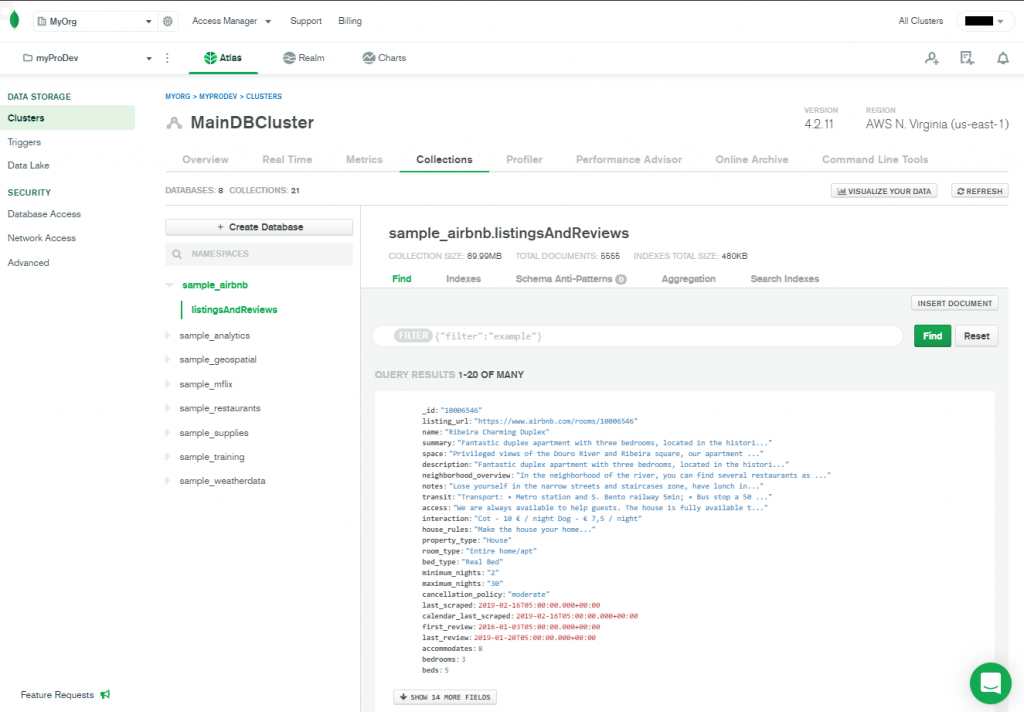
MainDBCluster Collection (simple_airbnb database)
Using MongoDB Compass
From the MongoDB Compass interface, we can simply select the necessary databases and collections and interact with documents as needed.
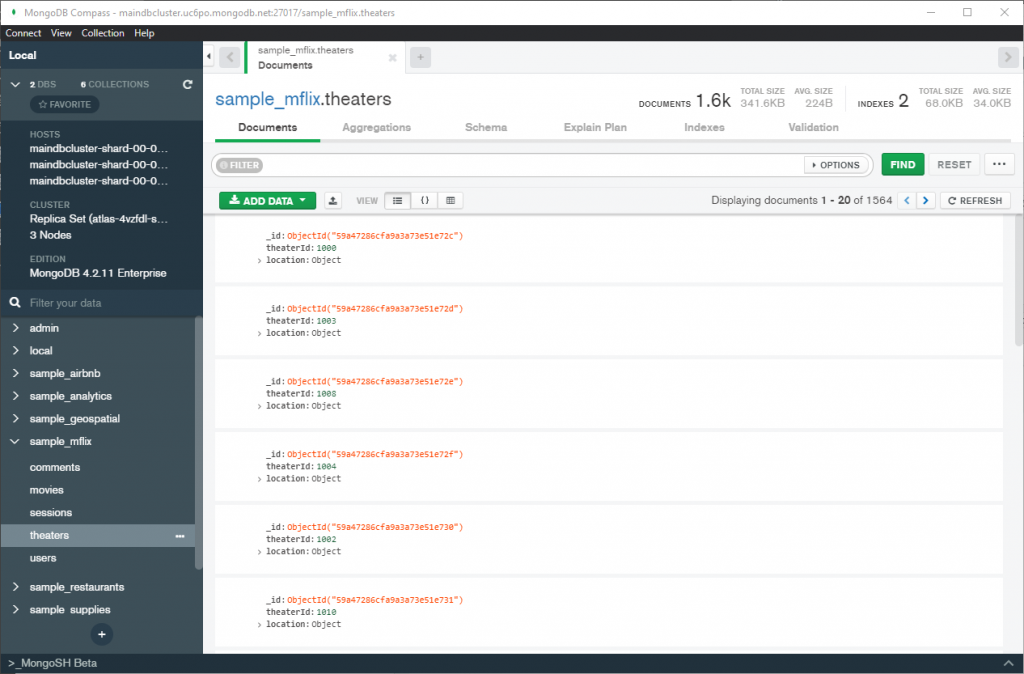
Collection view (simple_mflix database)
Both methods allow you to carry out all the necessary database functions without a command-line interface.
Monitoring the cluster
MongoDB Atlas provides metrics to monitor the cluster performance from the admin interface. Simply click on the Metrics button in the MainDBCluster, and you’ll be redirected to the metrics page:
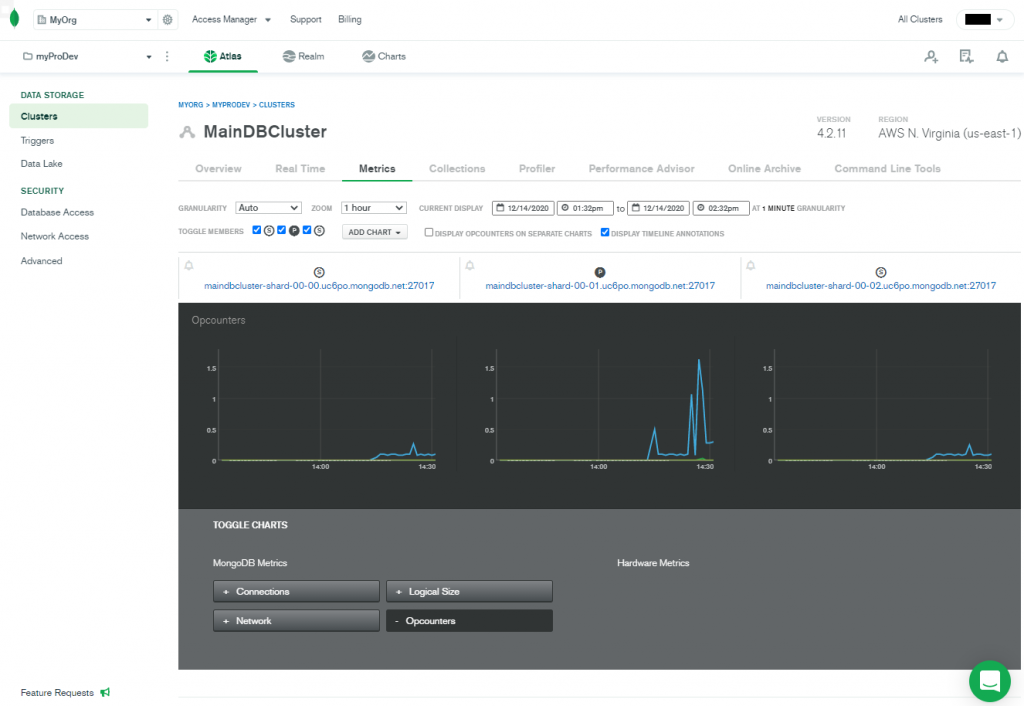
Atlas cluster metrics
That concludes this tutorial on MongoDB Atlas.
Related reading
- BMC Machine Learning & Big Data Blog
- MongoDB Guide, a series of tutorials
- Snowflake Guide
- MongoDB vs Cassandra: NoSQL Databases Compared
- CAP Theorem for Databases: Consistency, Availability & Partition Tolerance
These postings are my own and do not necessarily represent BMC's position, strategies, or opinion.
See an error or have a suggestion? Please let us know by emailing blogs@bmc.com.