
This article discusses the most useful commands for MongoDB database administration.
We’ll first get familiar with the basic concepts of MongoDB. Then, I’ll show you how to carry out a variety of basic administrative functions, with commands for:
- Connecting
- Viewing databases, collections, roles & users
- Managing users
- Checking logs
- Managing the database
- Gathering collection details
- Renaming collections
- Terminating an instance
Let’s get started!
(This article is part of our MongoDB Guide. Use the right-hand menu to navigate.)
MongoDB overview
MongoDB is a high performance, highly scalable cross-platform NoSQL database. MongoDB relies on concepts like Documents, Collections, and Databases:
- Collections and documents are analogous to the traditional table and rows in an RDBMS database.
- A single MongoDB instance can contain multiple databases. The database is a physical container for collections with a dedicated file structure in the system.
A Collection contains a group of MongoDB documents. Collections are created within a database and do not enforce a schema like a traditional database. Therefore different documents in the same collection can have different fields. MongoDB Documents are based on key-value pairs.
Let’s take a quick look at how traditional RDBMS terminology relates to MongoDB structure.
| Relational Database Management System | MongoDB |
| Database | Database |
| Table | Collection |
| Row | BSON document |
| Column | BSON field |
| Index | Index |
| Primary key | _id field (Primary key) By default, MongoDB auto-generates a 12-byte hexadecimal number for each document. |
| Group | Aggregation |
| Join | Embedding and linking |
Like any database, MongoDB needs administration. That’s where administrative commands come in—let’s take a look.
Commands for connecting to MongoDB
First, we need to know how to connect to a MongoDB database. You can use the mongo command to connect with a MongoDB database and use parameters like host and port if needed.
- mongo Run this command in the localhost shell to connect to the local database on the default port 27017.
- mongo <host>/<database> Specify the host and database as parameters to connect to a specific database.
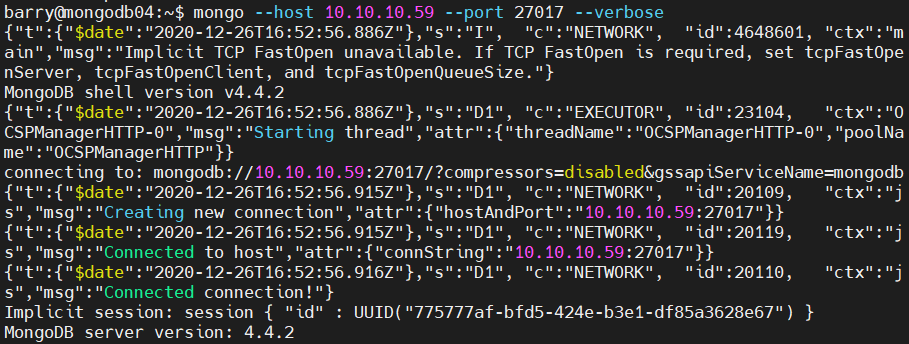
- mongo –host <hostname/IP> –port <port no> [options] You can use this format to specify different options while connecting the database. Refer to the mongo man pages or help for details information about all available options.
mongo --host 10.10.10.59 --port 27017 --verbose
mongo –host <hostname/IP> –port <port no> –authenticationDatabase <database> -u <user> -p <password>
If authentication is enabled in the MongoDB installation, we can specify the user details and the authentication database. The authentication database is where the user details reside, which can be any database that is used to create users. If you don’t give the password in the command, cmd will ask for it later.
mongo --port 27017 --authenticationDatabase "admin" -u "barryadmin" -p

MongoDB show command
Let us see how to view objects in a MongoDB database. You can get the existing databases, collections, roles, and users with the show command.
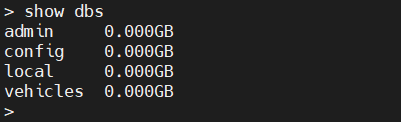
View all databases
show dbs
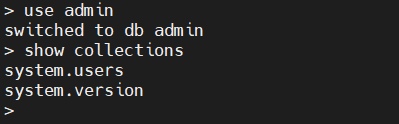
View collections inside a database
show collections / db.getCollectionNames()
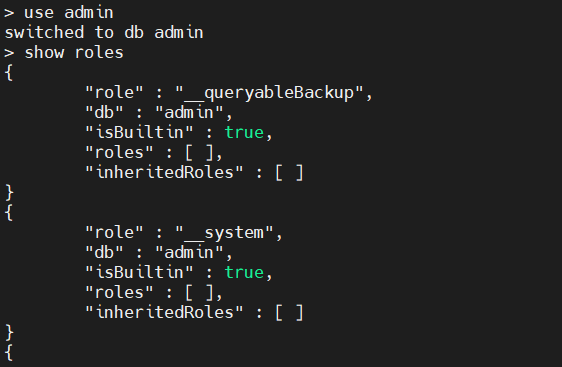
View roles in a database
show roles
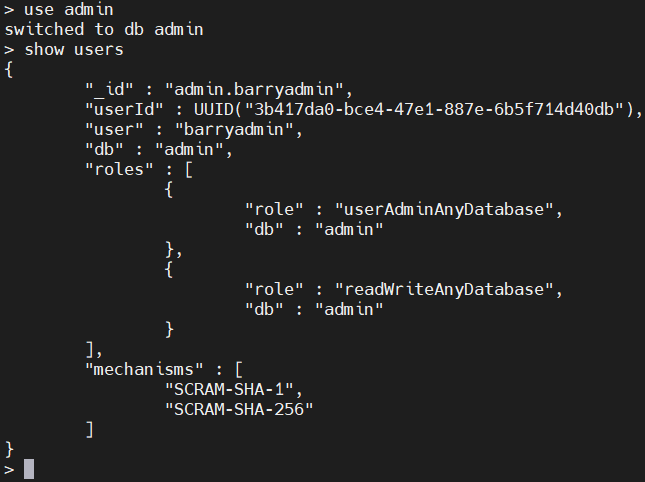
View users in a database
show users / db.getUsers()
User management commands
One of the most important administrative tasks is to manage permission for users. MongoDB provides this functionality using users and roles, and it has built-in roles for easy access controls.
You have to enable the “authentication” option in the MongoDB config file to use the access control feature. Add the following lines in mongod.conf file and restart the MongoDB service to reflect the changes.
/etc/mongod.conf
security:
authorization: "enabled"
Creating a user
The createUser command allows us to create users. Let’s create a user for the vehicles database with only read and write permissions.
Syntax:
db.createUser(
{
user: <username>,
pwd: <passwordPrompt() / Clear Text Password>,
roles: [
{role: <role>, db: <database>}
]
}
)
Example:
use vehicles
db.createUser(
{
user: "barryvehicles",
pwd: passwordPrompt(),
roles: [
{role: 'readWrite', db: "vehicles"}
]
}
)
Result:
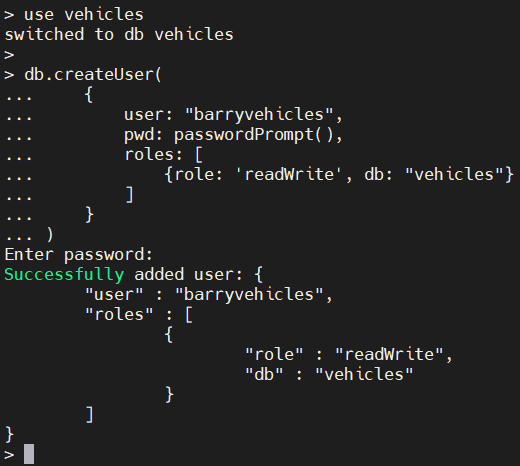
The passwordPromt() function will ask for the password when running the createUser command. The user is created in the “vehicles” database.
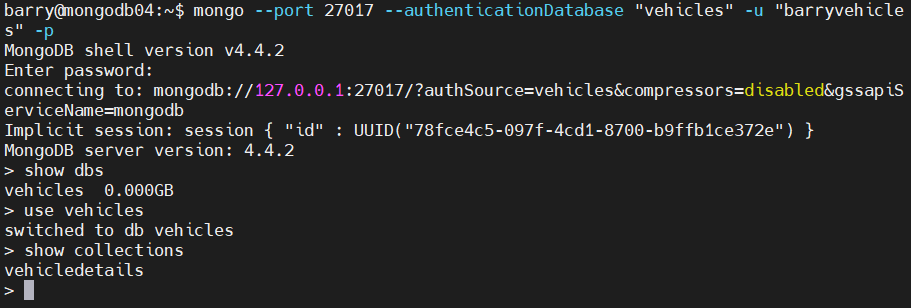
So, when we authenticate using this user, we must specify the “vehicles” database as the “authenticationDatabase”. A database user can be created in any database while defining permissions for other databases.
mongo --port 27017 --authenticationDatabase "vehicles" -u "barryvehicles" -p
Result:
Updating user details
We can update the details of the user using the updateUser() command. When updating user roles, we need to specify all the desired roles—because updateUser()will overwrite any existing rules.
In this example, we will update the “barryvehicles” user with a custom field and give read permission to the admin database. The “customData” section allows us to create any custom key pair. This has no effect on user roles; custom fields can be considered more of an informative section where we can add additional details for the user.
Syntax:
db.updateUser(
<"username">,
{
customData : { <custom fields> },
roles: [
{role: <role>, db: <database>}
]
}
)
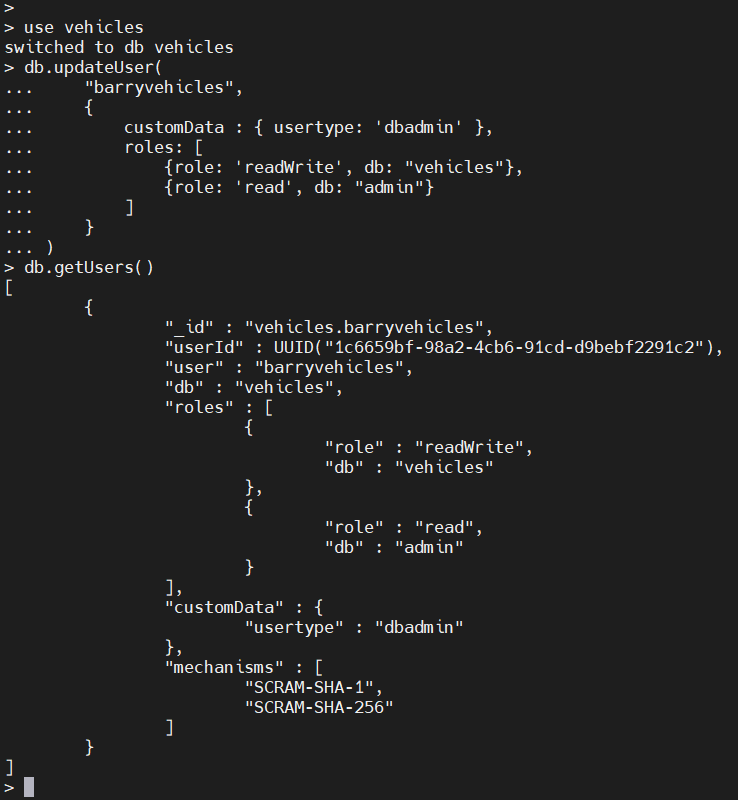
Example:
db.updateUser(
"barryvehicles",
{
customData : { usertype: 'dbadmin' },
roles: [
{role: 'readWrite', db: "vehicles"},
{role: 'read', db: "admin"}
]
}
)
Result:
Deleting a user
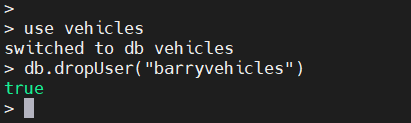
We can delete a user using the dropUser() command. In the following example, we will delete the user “barryvehicles”.
Syntax:
db.dropUser(<username>)
Example:
>db.dropUser("barryvehicles")
Result:
Checking logs
We have two methods for checking logs in MongoDB. We can:
- Check the mongod log file
- Use the getLog() command
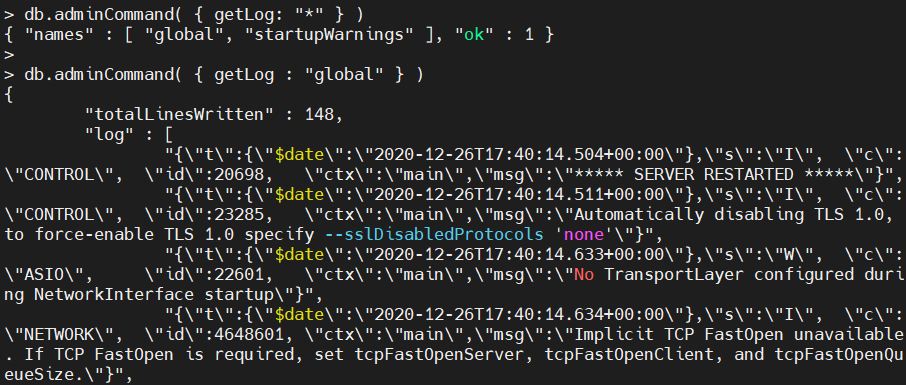
getLog() returns the most recent logged events. This command will read the recent 1024 MongoDB log events in the RAM cache. In earlier versions of MongoDB, logs were returned in plaintext format. However, in MongoDB 4.4, the logs are formatted in Extended JSON v2.0.
Syntax:
db.adminCommand( { getLog: <value> } )
There are three possible values for the getLog() command. Those are
- * returns the list of available values for getLog() command.
- global returns all the recent log entries.
- startupWarnings returns log entries that may contain errors or warnings since the start of the current process.
Example:
db.adminCommand( { getLog: "*" } )
db.adminCommand( { getLog : "global" } )
Result:
Database management commands
In this section, we will cover basic database management commands. These can help determine the server stats, collection stats, collection size, etc.
Help
help is an essential command in any administrator’s toolbox. The help command will give you a list of help options available in MongoDB.
Normal help:
help
Result:
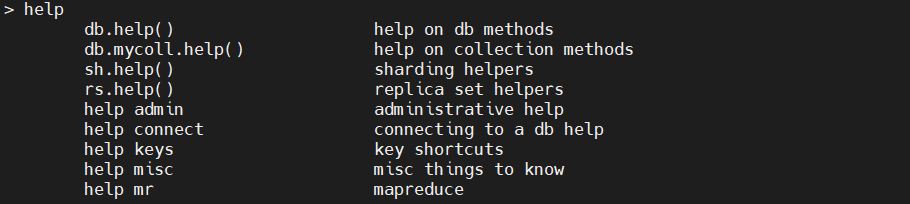
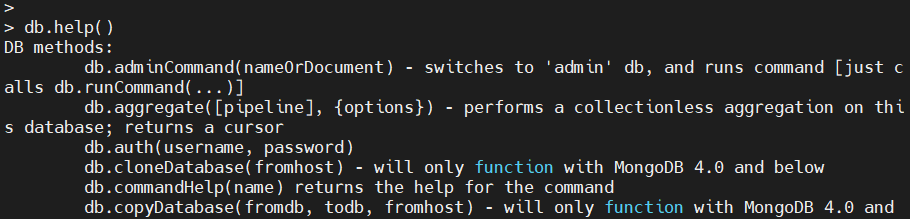
Here, you can see all the help options available in MongoDB. If you want to get all the help commands needed to work with databases, execute the db.help() command.
db.help()
Result:
Get database details
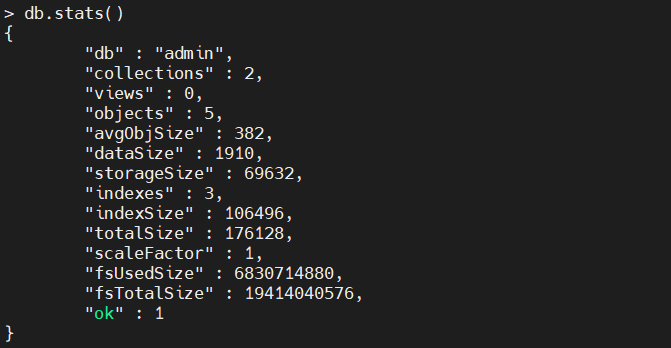
The stats() command provides statistics of the database. The information provided ranges from the number of collections and objects (documents), database sizes to indexes.
The scaleFactor reflects how data sizes are represented. The default scaleFactor is set to 1, which shows data in bytes. For example, we can change the scaleFactor to 1024 to show the sizes in kilobytes.
db.stats()
Result:
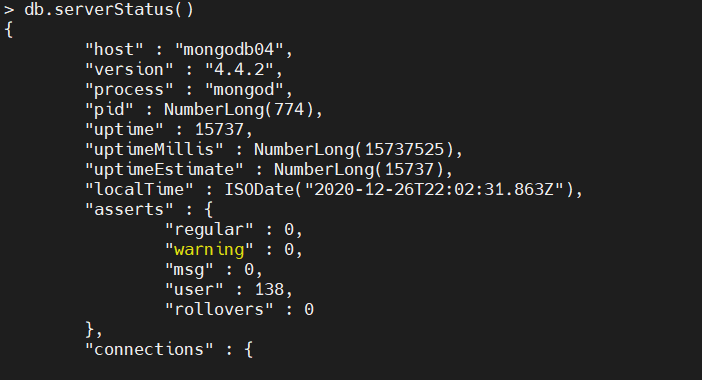
If you want to get the server details, use the db.serverStats() command.
db.serverStats()
Result:
To get a list of connection names, use getCollectionNames() command.
db.getCollectionNames()
Result:

Obtaining and returning collection details
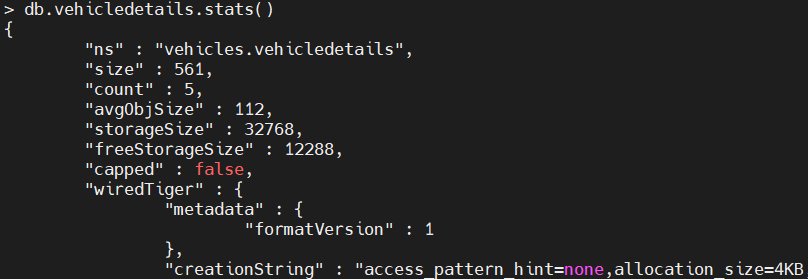
Get collection statistics
The status() function will provide a comprehensive overview of the collection.
db.vehicledetails.stats()
Result:
Get collection latency
Use the latencyStatus() command to obtain the average latency of the read, write operations and the number of read and write operations.
db.vehicledetails.latencyStats()
Result:

Get collection sizes
The following commands are used to find out the sizes of Collections in various ways:
- dataSize() shows the size of data within the collection.
- storageSize() indicates the total amount of storage allocated to the documents in the collection.
- totalSize() indicates the total size of the collection, including documents and the indexes.
- totalIndexSize() provides the indexed size of the collection.
db.vehicledetails.dataSize()
db.vehicledetails.storageSize()
db.vehicledetails.totalSize()
db.vehicledetails.totalIndexSize()
Result:
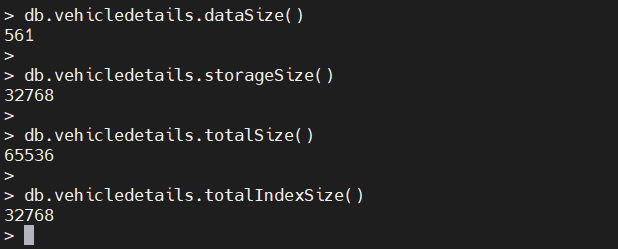
Because the “vehicledetails” is a small collection, the storageSize is equal to totalIndexSize as the indexed data is equal to the raw data in the collection, and further compression is unfeasible.
Renaming collections
We can rename an existing collection with the renameCollection function. (This function is not compatible with sharded collections.)
When renaming a collection, we need to specify the source namespace and the destination namespace correctly. In MongoDB, namespace relates to the unique name in which we can identify database objects.
In the below example, we are renaming the “vehicledetails” collection in the vehicle database. We have defined the namespaces as <database>.<collectionname> to differentiate between the old and new collections.
db.adminCommand( { renameCollection: "vehicles.vehicledetails", to: "vehicles.vehicleinformation" } )
Result:

Terminating the server
If we want to completely terminate the MongoDB instance, we can use the built-in shutdownServer() command. shutdownServer() will clean up all the resources used by databases before terminating the MongoDB process.
The command must be issued against the admin database to be executed. We can achieve this by using the getSiblingDB function to indicate the admin database.
Syntax:
db.shutdownServer({
force: <boolean>,
timeoutSecs: <int>
})
The force option forces a shutdown operation and interrupts any ongoing operations to terminate the MongoDB instance. The timeoutSec option can be used to set the time in seconds before a shutdown occurs. In an authenticated environment, the user must have the shutdown privilege to run this command.
In the following example, we will force a shutdown of the MongoDB instance in 10 seconds. The getSiblingDB function allows us to point the shutdown function to the admin database.
db.getSiblingDB("admin").shutdownServer({ "force": true, "timeoutSecs": 10 })
Result:

That concludes this MongoDB commands tutorial. All the above-mentioned commands can be further explored using the official MongoDB documentation.
Related reading
- BMC Machine Learning & Big Data Blog
- MongoDB Guide, a series of articles and tutorials
- MongoDB: The Mongo Shell & Basic Commands
- Snowflake Guide
- Data Storage Explained: Data Lake vs Warehouse vs Database
These postings are my own and do not necessarily represent BMC's position, strategies, or opinion.
See an error or have a suggestion? Please let us know by emailing blogs@bmc.com.