
MongoDB is a NoSQL database. That means the way we work in MongoDB is different from that of a relational database like MySQL. If you are coming from an RDBMS background, you will be quite comfortable with this topic.
Surprisingly, however, MongoDB doesn’t have a ‘create database’ operation to create a database as you do in SQL. So, in this article, let’s explore how to work with databases in MongoDB.
(This article is part of our MongoDB Guide. Use the right-hand menu to navigate.)
Installing MongoDB
If you haven’t installed MongoDB yet, let’s do it first. Download the MongoDB package suitable for your OS. Download the msi/zip file compatible with your OS and install the application. (I am not going to describe the installation process in detail, as it is straightforward.)
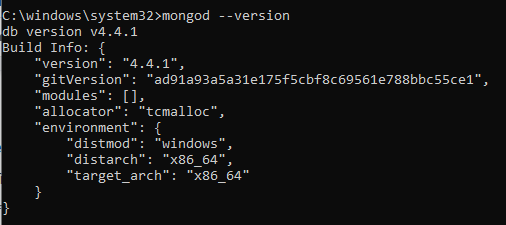
I assume now you have installed the MongoDB database successfully. Open your CMD and type mongod –version to verify your installation. If you get an output similar to the result in the picture below, everything is perfect.
Accessing the Mongo shell
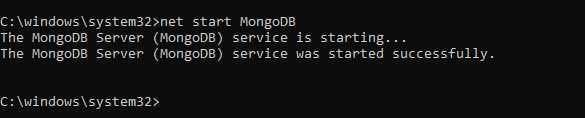
When you install MongoDB, a CLI tool called Mongo shell will be installed along with it. You can use it to give commands to the MySQL server. In order to get access to the mongo shell, you have to start the server with the following command:
net start MongoDB
If you get this output, the MongoDB server has successfully started:
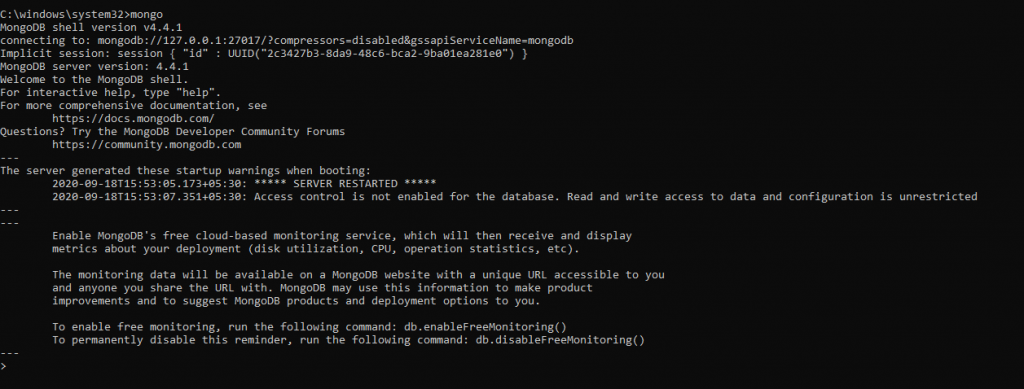
Next, we should run the MongoDB shell. To do that, type the command mongo in the CMD.
Now you are in the MongoDB shell, where you can execute commands to:
- Create databases
- Insert data
- Edit and delete data from databases
- Issue administrative commands
Creating a Mongo database
As I said earlier, there is no ‘create database’ command in MongoDB. It doesn’t mean there is no way to create a database—of course there is. Let’s see how, by creating a database called Company using the shell.
MongoDB has a keyword called ‘use,’ which is used to switch to a specified database. For example, if you want to connect with an existing database named Employee, you can use the command ‘use Employee’ to connect with it. However, if there is no database as Employee, the command ‘use’ will create it and connects you to it. Let’s use the ‘use’ command to create our database.
use Company
When you use the command, you will see the following output:
![]()
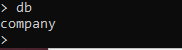
Mongo has created the company database and connected you to it. You can use the db command to confirm, which will display the currently connected database.
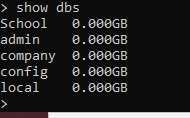
You might want to see all the existing databases before creating a new database. You can do it with the show dbs command, and it will return the following result:
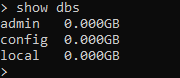
Installing MongoDB creates three default databases:
- Admin
- Config
- Local
Surprisingly, the database we just created is not listed. This is because MongoDB doesn’t truly create the database until we save values to it.
One of the critical features in NoSQL databases like MongoDB is that they are schema-less—there’s no schema. That means you don’t specify a structure for the databases/tables as you do in SQL. Instead of tables and rows in SQL, MongoDB has collections and documents. So, let’s see how you work with collections in MongoDB.
Using collections in MongoDB
In SQL, you have tables that have a well-defined structure with columns and specified data types. You insert data into tables as records. Every record you insert should have values (including null values) for every column defined on the table.
In contrast, NoSQL has collections instead of tables. These collections don’t have any structure, and you insert data, as documents, into the collection. That means that one document can be completely different from another document. Let’s create a collection called Employee and add a document to it.
Before you could create a collection, remember that you add data to documents in JSON format. So, the command to insert one document to our database will look like this:
db.Employee.insert(
       {
              "Employeename" : "Chris",
              "EmployeeDepartment" : "Sales"
       }
)
If the insertion is successful it will return WriteResult({ “nInserted” : 1 }):
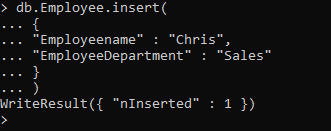
First, switch to the database to add values using the ‘use’ command. Then use db.Employee.insert command to add a document to the database:
- Db refers to the currently connected database.
- Employee is the newly created collection on the company database.
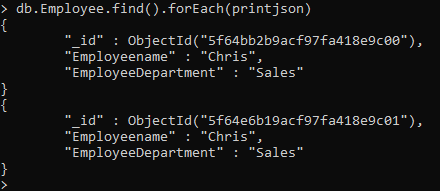
A significant issue you’ll notice in this query is we haven’t set a primary key. MongoDB automatically creates a primary key field called _id and sets a default value to it. To see this, let’s view the collection we just created. Run the following command to access our collection in JSON format.
db.Employee.find().forEach(printjson)
It will print the following output:
In MongoDB, you cannot set an arbitrary field to the primary key. However, you can change the value of the default primary key. Let’s add another document while giving value for _id as well.
db.Employee.insert(
       {
              "_id" : 1,
              "EmployeeName" : "Mark",
              "EmployeeDepartment" : "Marketing"
       }
)
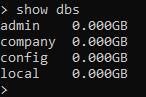
Great. Now we know how to use the primary key as well. Let’s get back to our main topic. Have we created our database now? Run the following command again to find it out.
show dbs
Now you can see the database ‘company’ is listed in the result: it worked!
Removing a database
It’s not good to leave this meaningless database on your server. So, let’s remove it as it is a good chance for us to learn how to drop a database. To drop any database you want, first, you have to connect with it using the use keyword.
use Company
Next, type db.dropDatabase() to remove the database from your server.

Run the show dbs command again to verify it.

Using MongoDB Compass
That should be the end of our tutorial—we created and removed a Mongo database. However, I want to talk about one more thing. Although the Mongo shell is a great tool for working with MongoDB servers, many people find it difficult, especially in a production environment.
That’s why I encourage you to get familiar with a MongoDB Compass tool, a great GUI to work with MongoDB. Here, I will show you how to create a database in Compass GUI. You can download the Compass IDE for any operating system. Again, the installation process is very straightforward.
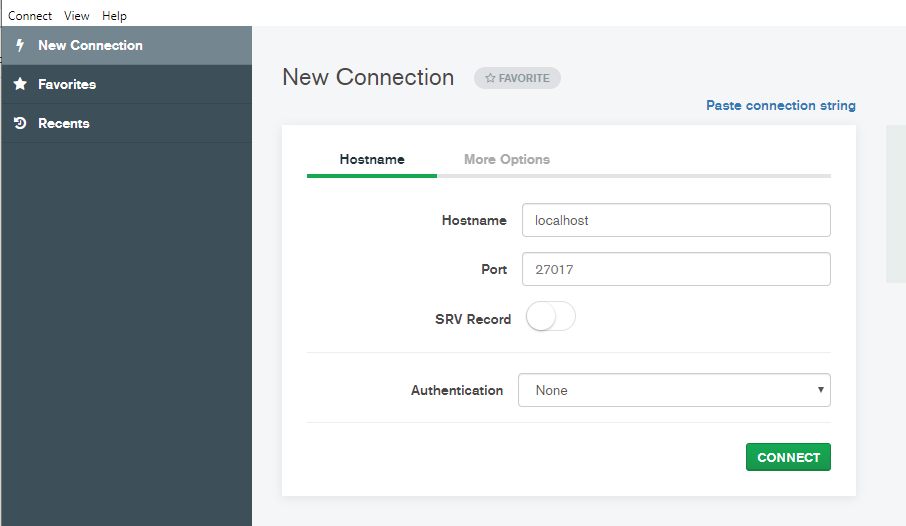
Now open the application and create a connection with the MySQL server that we installed earlier.
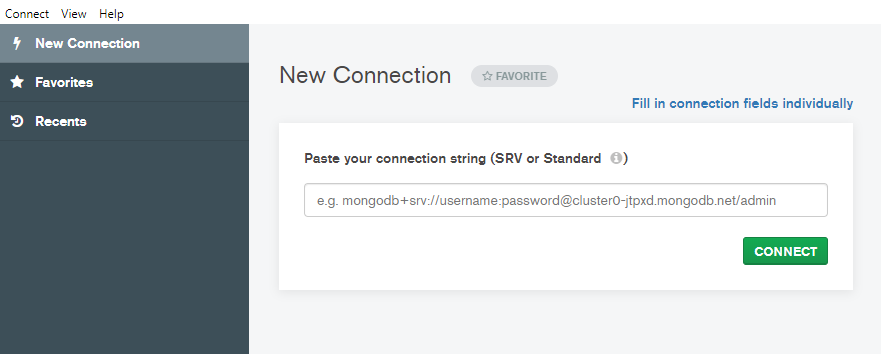
Go to ‘Fill in connection fields individually.’ It will take you to the following screen. If you use the default values when installing MongoDB, all you have to do is click the CONNECT button.
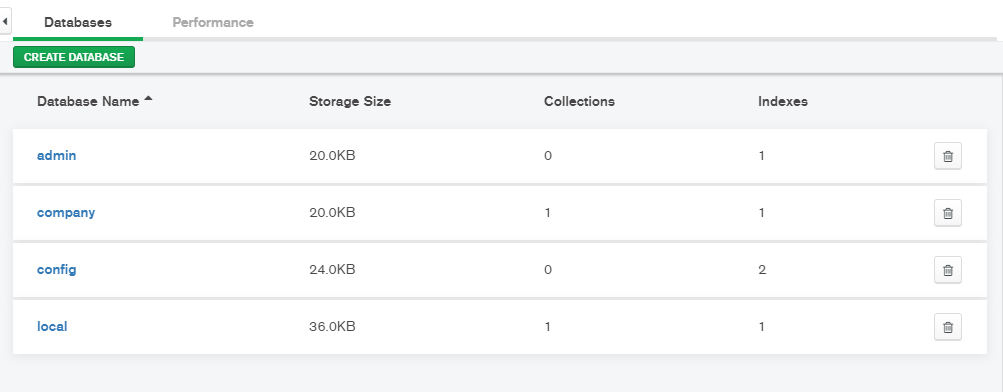
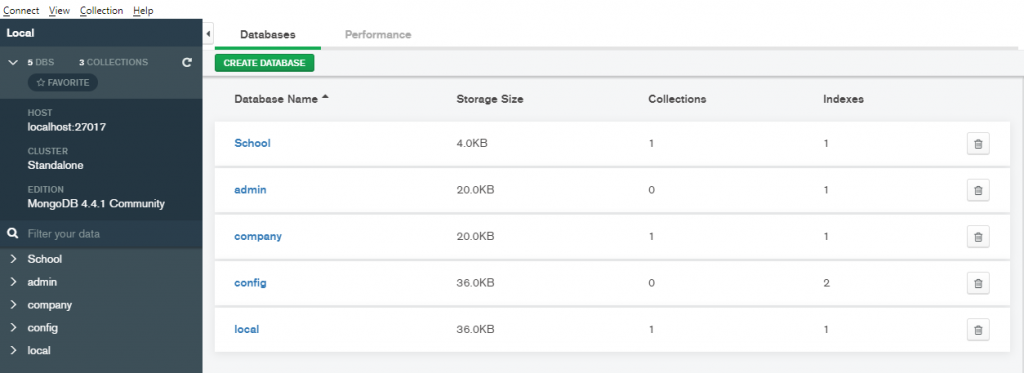
Now you can see a list of databases available on your MongoDB server.
Click the create database button to create a new database. Then, give a database name and a collection name:
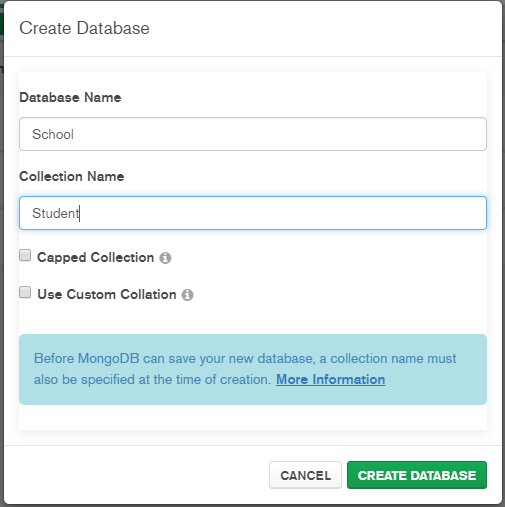
Unlike the Mongo shell, Compass will create a database even without adding any data:
We can verify it with the Mongo shell as well:
Compass has a very intuitive interface way to work with the MongoDB database. It will save a lot of time when you are developing large applications. However, I still recommend you use the Mongo shell and get a good grasp of it.
We’ll see you next time for another MongoDB tutorial.
Additional resources
For more tutorials like this, explore these resources:
- BMC Machine Learning & Big Data Blog
- MongoDB Guide, a series of tutorials
- PostgreSQL vs MongoDB: Comparing Databases
- MongoDB vs Cassandra: NoSQL Databases Compared
- How To Connect Amazon Glue to a JDBC Database
These postings are my own and do not necessarily represent BMC's position, strategies, or opinion.
See an error or have a suggestion? Please let us know by emailing blogs@bmc.com.