
MongoDB and Docker containers
Since MongoDB is among the most popular NoSQL databases today, you may find it necessary to run MongoDB as a Docker container. In this article, you’ll learn:
- The Benefits of using MongoDB in a Docker container
- How to install Docker
- How to install Docker Compose
- How to configure MongoDB as a Docker container
- How to establish external connections to MongoDB containers
- How to set up advanced Docker containers for MongoDB
At the end of this tutorial, we will look at advanced configurations that give you a glimpse of the extensibility of a containerized project. We will create a self-containing project with a MongoDB instance and Mongo Express web interface on a dedicated network, and Docker volume to maximize the portability of the project.
Let’s get started.
(This article is part of our MongoDB Guide. Use the right-hand menu to navigate.)
Benefits of using MongoDB in a Docker container
Docker is a tool to easily use containers to create, deploy, and run applications. A container is a standard unit of software that puts applications and all its dependencies in a single package. The value of such containers is that the software can run on any server platform, regardless of its hardware or configuration.
You can use Docker to run MongoDB instances. When you set up MongoDB Docker container instances, you can create a portable and extensible NoSQL database. This containerized MongoDB instance behaves exactly like a non-containerized MongoDB instance, without the worry of the server configuration.
Installing Docker
We will start this tutorial by setting up a simple Docker installation to run containers on a Ubuntu-based server. We can get the Docker installation packages from the official Docker repository. Here are the installation steps:
1. Update existing packages.
sudo apt update && sudo apt upgrade -y

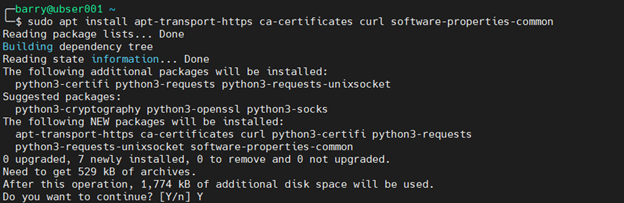
2. Install prerequisite packages.
sudo apt install apt-transport-https ca-certificates curl software-properties-common
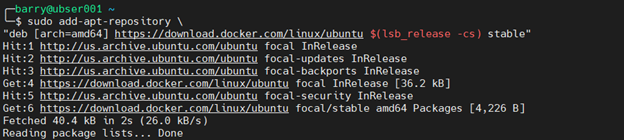
3. Add the GPG key from the official Docker repository.
curl -fsSL https://download.docker.com/linux/ubuntu/gpg | sudo apt-key add -

4. Add the official Docker repository to APT sources.
sudo add-apt-repository
"deb [arch=amd64] https://download.docker.com/linux/ubuntu $(lsb_release -cs) stable"
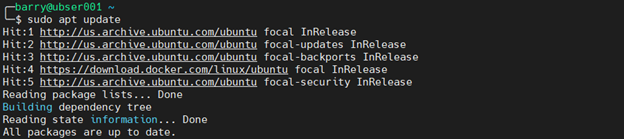
5. Update the Ubuntu package list.
sudo apt update
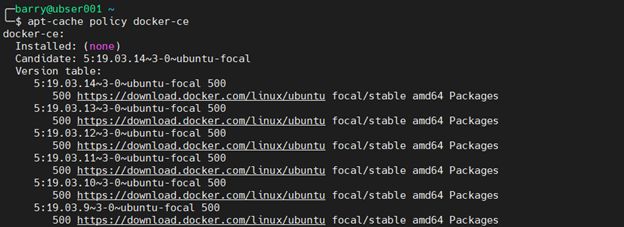
6. Verify the Docker repository.
apt-cache policy docker-ce
7. Install the Docker community edition.
sudo apt install docker-ce
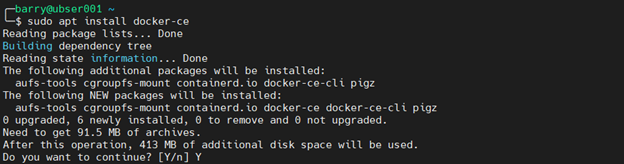
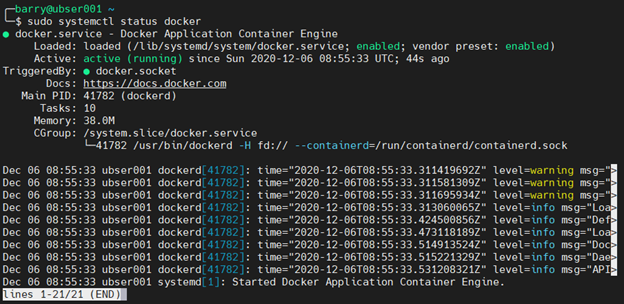
8. Check the status of the installation with the following command. If the service status returns active (running), Docker is successfully installed and active on the system.
sudo systemctl status docker
Installing Docker Compose
We can use the command line interface (CLI) to create and manage Docker containers. Using CLI can be tedious when dealing with multiple containers and configurations.
Instead, you can use Docker Compose to take multiple containers and integrate them into a single application. It uses the YAML format to create the Compose files that can be easily executed using docker-compose up or down commands that will create or remove all the containers and configurations within a Compose file, respectively.
Let’s install Docker Compose on the Ubuntu server.
1. Install the current stable release of Docker Compose.
sudo curl -L "https://github.com/docker/compose/releases/download/1.27.4/docker-compose-$(uname -s)-$(uname -m)" -o /usr/local/bin/docker-compose

2. Apply executable permissions for the downloaded binary.
>sudo chmod +x /usr/local/bin/docker-compose
![]()
3. Verify the Docker Compose installation.
docker-compose --version

Setting up MongoDB using a Docker Compose container
This section explains how to set up a MongoDB container using a Docker Compose file.
Before we create the Compose file, let’s search for the official MongoDB container image using the search command.
sudo docker search mongodb

The search results show us that an official MongoDB container image called “mongo” exists in the Docker container registry.
By default, the MongoDB container stores the databases within the /data/db directory within the container.
Create a Docker Compose directory to hold MongoDB
Next, we need to create a directory called “mongodb” to hold the Docker Compose file. We will create another directory called “database” inside the “mongodb” directory to map to the database location of the container and enable local access to the database. We use the -pv operator to create those parent folders.
>mkdir -pv mongodb/database

The following docker-compose.yml file will be created within the “mongodb” directory to construct the MongoDB container.
docker-compose.yml
version: "3.8"
services:
mongodb:
image : mongo
container_name: mongodb
environment:
- PUID=1000
- PGID=1000
volumes:
- /home/barry/mongodb/database:/data/db
ports:
- 27017:27017
restart: unless-stopped
We used version 3.8 to create the above Compose file. The Compose file version directly correlates to:
- Which options are available within the Compose file.
- The minimum supported Docker Engine version.
In this case, It’s Docker engine 19.03.0 or newer.
MongoDB service within the Docker container
In the Compose file, we have created a service called “mongodb” using the Docker image “mongo.” We have named the container “mongodb” and mapped the database folder within the container to the local database folder (/home/barry/mongodb/database.) These kinds of mappings are known as bind-mount volumes.
The environment variables are used to define the “user” and “group” of the container. Finally, we mapped the local port 27017 to internal port 27017. Then the restart policy is set to restart unless stopped by the user.
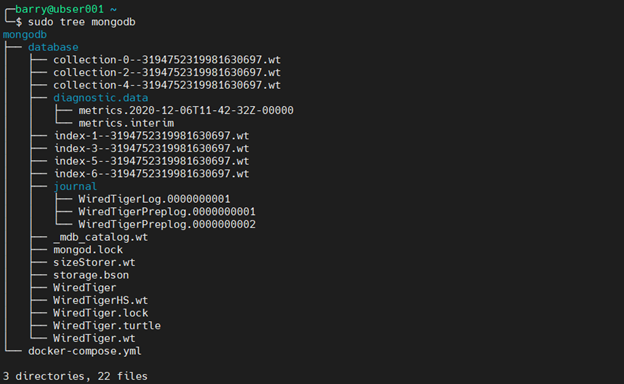
Here’s the file structure of the project:
tree mongodb

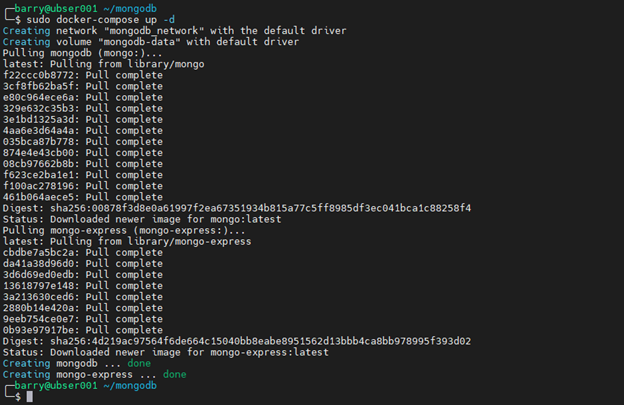
Starting the MongoDB Docker container
Go to the “mongodb” folder and run the docker-compose up command to start the MongoDB container. The -d operator runs the detached container as a background process.
sudo docker-compose up -d
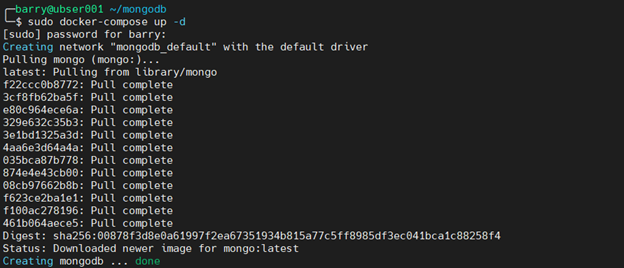
The up command will pull the “mongo” image from the Docker registry and create the container using the given parameters in the docker-compose.yml file.
Let’s verify if the container is running and the local folder is populated by using the following commands. The -a operator will display all the containers within the system regardless of their status.
sudo docker ps -a

sudo tree mongodb
Interacting with MongoDB in a Docker container
Using the Docker exec command, we can access the terminal of the MongoDB container. Since the container runs in a detached mode, we will use the Docker interactive terminal to establish the connection.
sudo docker exec -it mongodb bash
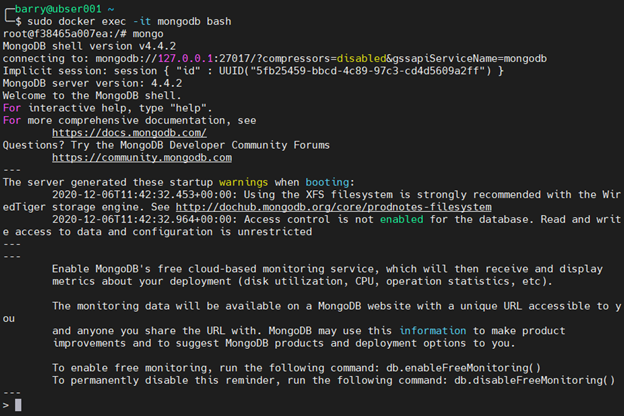
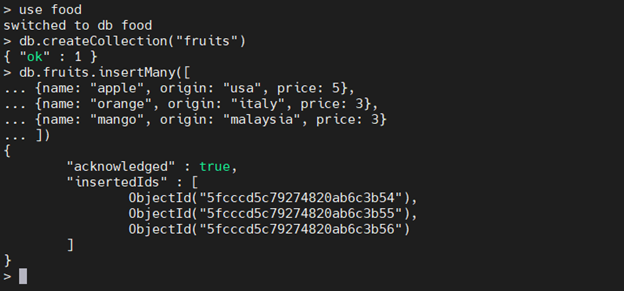
In the container’s bash terminal, we call the mongo command to access MongoDB. For this MongoDB Docker Compose example, we will create a database called “food” and a collection called “fruits,” along with three documents.
1. Switch the database.
use food
2. Create the collection.
db.createCollection("fruits")
3. Insert documents
db.fruits.insertMany([ {name: "apple", origin: "usa", price: 5}, {name: "orange", origin: "italy", price: 3}, {name: "mango", origin: "malaysia", price: 3} ])
Search for the documents using the find command.
db.fruits.find().pretty()
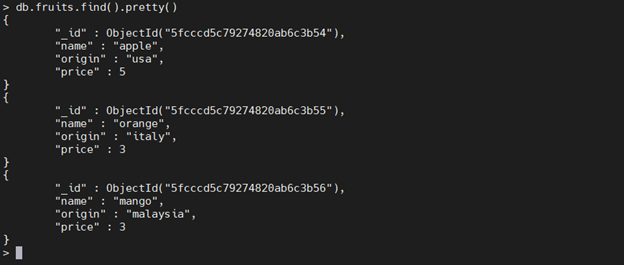
The MongoDB container will act like any normal MongoDB installation, with no concerns about the underlying software and hardware configuration. Using the exit command, we can exit both the MongoDB shell and container shell.

External connections to MongoDB container
While creating the MongoDB container, we mapped the internal MongoDB port to the corresponding port in the server, exposing the MongoDB container to external networks.
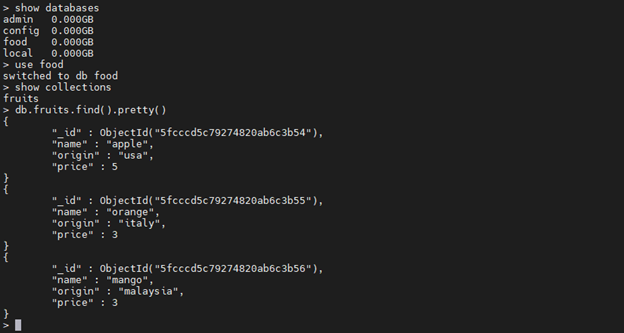
The following MongoDB Docker Compose example demonstrates how we can connect to the container from an external endpoint by simply pointing the mongo command to the appropriate server and port.
mongo 10.10.10.60:27017

The find command in our MongoDB Docker Compose example will search for the fruits collection and its documents to verify that we are connected to the MongoDB container.
show databases
use food
show collections
db.fruits.find().pretty()
Data resilience and recreating the MongoDB Docker container
We’ve mapped the database to a local folder so that, even if you remove the container, you can use the saved data in the local folder to recreate a new MongoDB container.
Let’s test that. We’ll:
- Remove the container using the docker-compose down.
- Delete the associated images.
- Recreate a new MongoDB database using the Compose file and local database files.
Remove the MongoDB container.
sudo docker-compose down

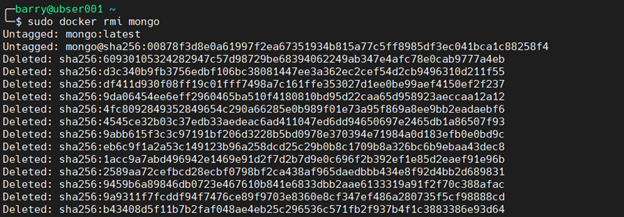
Remove the local mongo image.
sudo docker rmi mongo
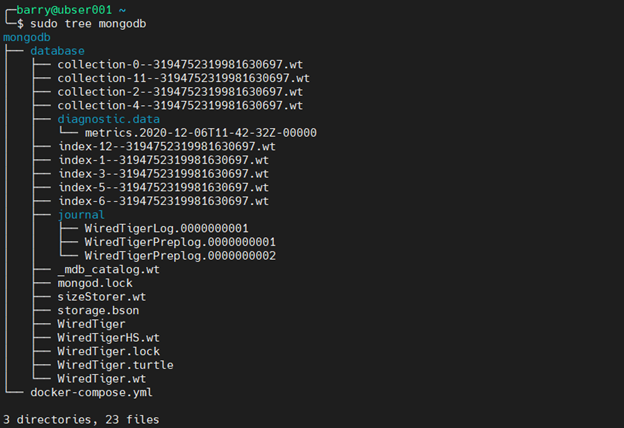
Verify the local database files.
From the output below, we can identify that even though we removed the containers, the data mapped to a local directory did not get removed.
sudo tree mongodb
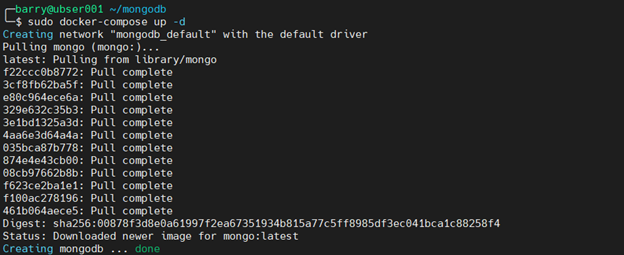
Recreate a new MongoDB Docker container.
Now, we will recreate the container using the original docker-compose.yml file. We execute the following command in the “mongodb” folder.
sudo docker-compose up -d
Verify the data in the MongoDB container.
Let’s now access the bash shell in the container and check for the “fruits” collections.
sudo docker exec -it mongodb bash

show databases
use food
db.fruits.find().pretty()
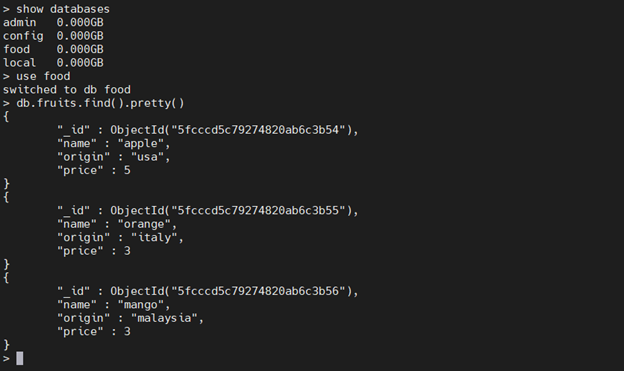
The result indicates we created the new container with the local database information associated with the new container.
Additionally, we can simply move the container by moving the local folder structure to a new server and creating a container using the docker-compose.yml file. You can use Docker volumes instead of locally saving the data to increase the portability of the database.
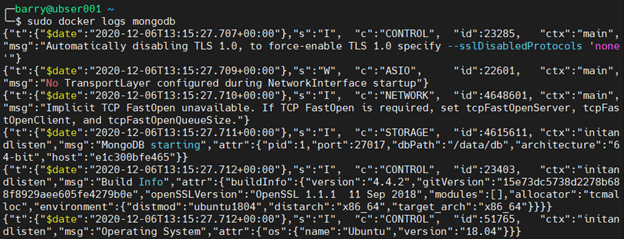
Monitoring the MongoDB container log files
Every container creates logs that you can use to monitor and debug the container. We can access the container logs using the Docker logs command with the container name to be monitored.
sudo docker logs mongodb
Setting up advanced Docker containers for MongoDB
In this section, we’ll create a secure MongoDB container that requires a username and password to access the database.
In earlier MongoDB Docker Compose examples, we mapped the database data to a local folder. This method is tedious and requires manual intervention when moving the Docker container. Using Docker volumes, we can create Docker-native, persistent volumes that you can easily transfer between Docker installations.
Although we can use the CLI to manipulate the MongoDB instance, a graphical user interface (GUI) is more convenient.
Mongo Express is a web-based MongoDB administration interface that also can be run as a containerized application.
The docker-compose file comes in handy as a single YAML file that captures all the requirements.
docker-compose.yml
version: "3.8"
services:
mongodb:
image: mongo
container_name: mongodb
environment:
- MONGO_INITDB_ROOT_USERNAME=root
- MONGO_INITDB_ROOT_PASSWORD=pass12345
volumes:
- mongodb-data:/data/db
networks:
- mongodb_network
ports:
- 27017:27017
healthcheck:
test: echo 'db.runCommand("ping").ok' | mongo 10.10.10.60:27017/test --quiet
interval: 30s
timeout: 10s
retries: 3
restart: unless-stopped
mongo-express:
image: mongo-express
container_name: mongo-express
environment:
- ME_CONFIG_MONGODB_SERVER=mongodb
- ME_CONFIG_MONGODB_ENABLE_ADMIN=true
- ME_CONFIG_MONGODB_ADMINUSERNAME=root
- ME_CONFIG_MONGODB_ADMINPASSWORD=pass12345
- ME_CONFIG_BASICAUTH_USERNAME=admin
- ME_CONFIG_BASICAUTH_PASSWORD=admin123
volumes:
- mongodb-data
depends_on:
- mongodb
networks:
- mongodb_network
ports:
- 8081:8081
healthcheck:
test: wget --quiet --tries=3 --spider http://admin:admin123@10.10.10.60:8081 || exit 1
interval: 30s
timeout: 10s
retries: 3
restart: unless-stopped
volumes:
mongodb-data:
name: mongodb-data
networks:
mongodb_network:
name: mongodb_network
Now, let’s break down the Compose file given above. First, we have created two services:
- mongodb
- mongo-express
mongodb service
We configured the root username and password of the “mongodb” container using the following environment variables:
- MONGO_INITDB_ROOT_USERNAME
- MONGO_INITDB_ROOT_PASSWORD
We mapped the data volume to mongodb-data Docker volume, and defined the network as mongodb_network, while opening port 27017.
mongo-express service
The environment variables of the mongo-express container are:
- ME_CONFIG_MONGODB_SERVER – MongoDB service (mongodb)
- ME_CONFIG_MONGODB_ENABLE_ADMIN – Enable access to all databases as admin
- ME_CONFIG_MONGODB_ADMINUSERNAME – Admin username of the MongoDB database
- ME_CONFIG_MONGODB_ADMINPASSWORD – Admin password of the MongoDB database
- ME_CONFIG_BASICAUTH_USERNAME – Mongo-Express web interface access username
- ME_CONFIG_BASICAUTH_PASSWORD – Mongo-Express web interface access password
Additionally, we configured the mongo-express service to depend on the mongodb service. We assigned the network the same mongodb_network, and mapped the volumes to mongodb-data volume. We exposed the port 8081 to allow access to the web interface.
We can monitor both services using Docker health checks. The mongodb service will ping the MongoDB database, while the mongo-express service will try to access the web page using the given credentials.
Finally, we defined a volume called “mongodb-data” and a network called “mongodb_network” for the project.
Start the Docker Compose file.
sudo docker-compose up -d
The above output contains no errors, so we can assume that all the services are created successfully. Because we have added health checks for both services, we can verify it by using the Docker ps command.
sudo docker ps -a

The Docker ps command prints the health status of the container. This health status is only available if you have defined a health check for the container.
Monitoring with Mongo Express
Now, let’s go to the Mongo Express web interface using the server IP (http://10.10.10.60:8081.)
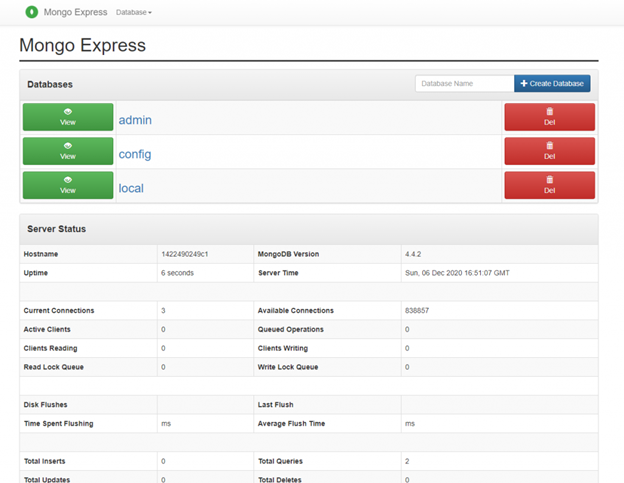
The Mongo Express interface provides a convenient way to interact with the MongoDB database. The Mongo Express interface also provides an overview status of the MongoDB server instance, providing a simple monitoring functionality.
Conclusion
We created this Docker MongoDB tutorial because of the popularity of MongoDB among NoSQL databases and the benefits you can achieve by using it in a Docker container.
Using MongoDB in Docker containers creates consistent development and production environments for smoother deployments. Unlike virtual machines, Docker containers demand fewer resources.
With a mastery of simple and advanced Docker containers, your software development processes can be far more efficient and trouble-free.
These postings are my own and do not necessarily represent BMC's position, strategies, or opinion.
See an error or have a suggestion? Please let us know by emailing blogs@bmc.com.